The DigiWorks Knowledge Base
How to change your password in PHPMyAdmin
Friday, March 31st, 2017
Its not uncommon for some one to hack a website and change both the password and email address of an account. When this happens, its impossible to reset your password the normal way as the reset link is being sent to the new email address assigned to the account.
To fix this you will need to access your websites database and change the password/email combination manually. There are two methods of changing the combination, the first doesn’t require any coding, while the second method requires a bit of MySQL but is quicker.
Method 1: PHPMyAdmin Table Editing
This method is the one I would recommend to any one who doesn’t have any experience with MySQL. It’s relatively straight forward and minimizes the risk of breaking your database.
Step One
Find the PHPMyAdmin option in your cPanel, or which ever hosting panel you have.
Step Two
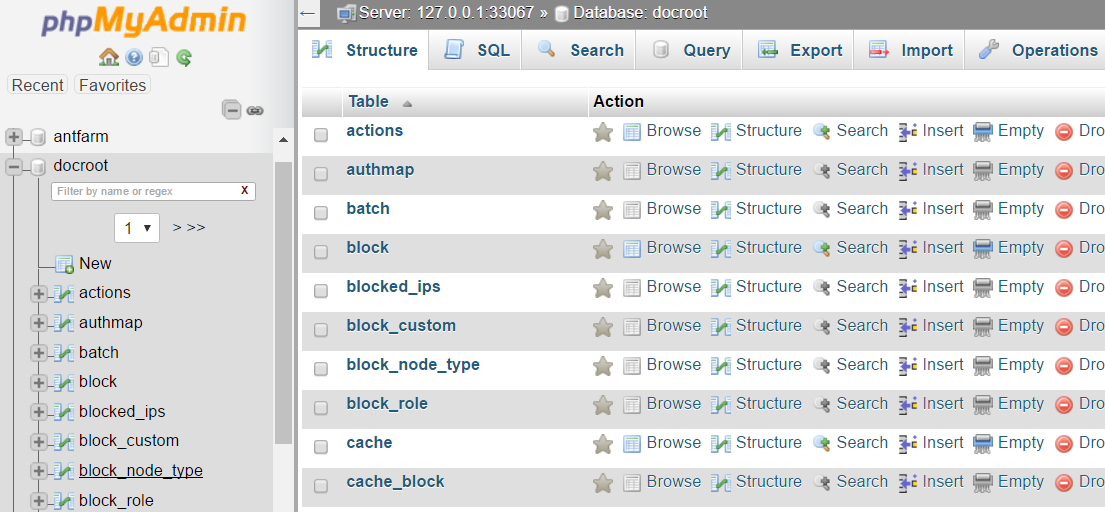
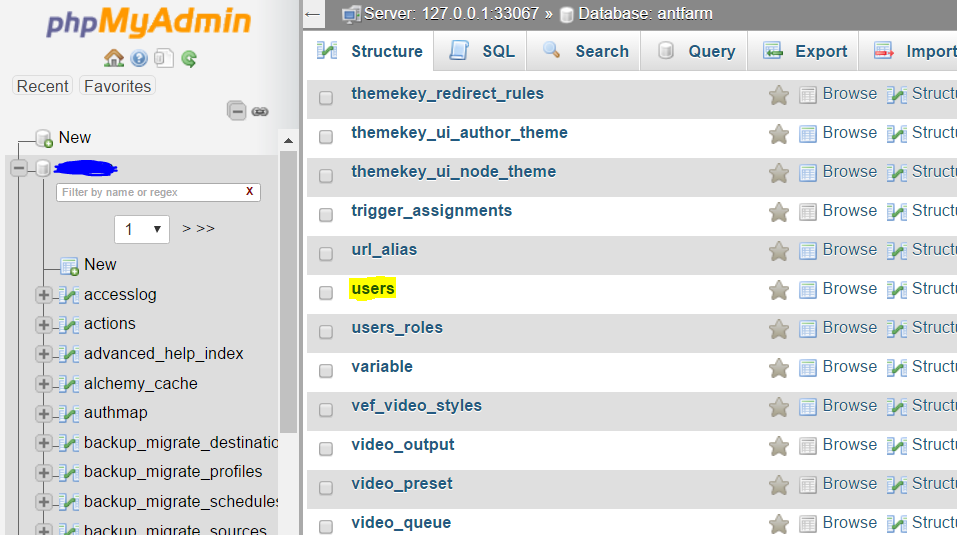
Look for the database that corresponds with the site you want to gain access to. For more common frameworks like WordPress, your database should start with _wp followed by a group of numbers. If you created a custom name for your database then select that database.
Step Three
Navigate to the wp_users tab and select it. Find the user who’s password you want to change and click the “edit” button to the left of the user name.
Step Four
In the user_pass section, change the function to MD5 and enter a new password in the Value column. If you need to, you can also change the email address in the email section.

Step Five
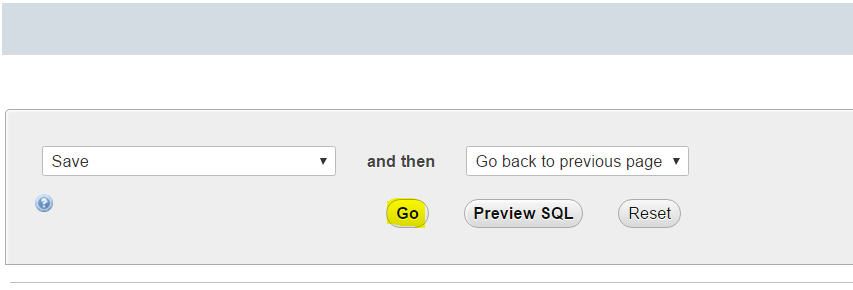
Once you are happy with the values you’ve entered, save the new values by clicking the go button at the bottom of the page.
Method 2: Using a MySQL Query
I would advise that you only use this method if you have some experience with coding. The only real difference between the two is how much you want to feel like a kick ass hacker in front of your co-workers.
Step One
Find the PHPMyAdmin option in your cPanel, or which ever hosting panel you have.
Step Two
Look for the database that corresponds with the site you want to gain access to. For more common frameworks like WordPress, your database should start with _wp followed by a group of numbers. If you created a custom name for your database then select that database.
Step Three
Navigate to the wp_users tab and select it. Find the user who’s password you want to change and click the “edit” button to the left of the user name.
Step Four
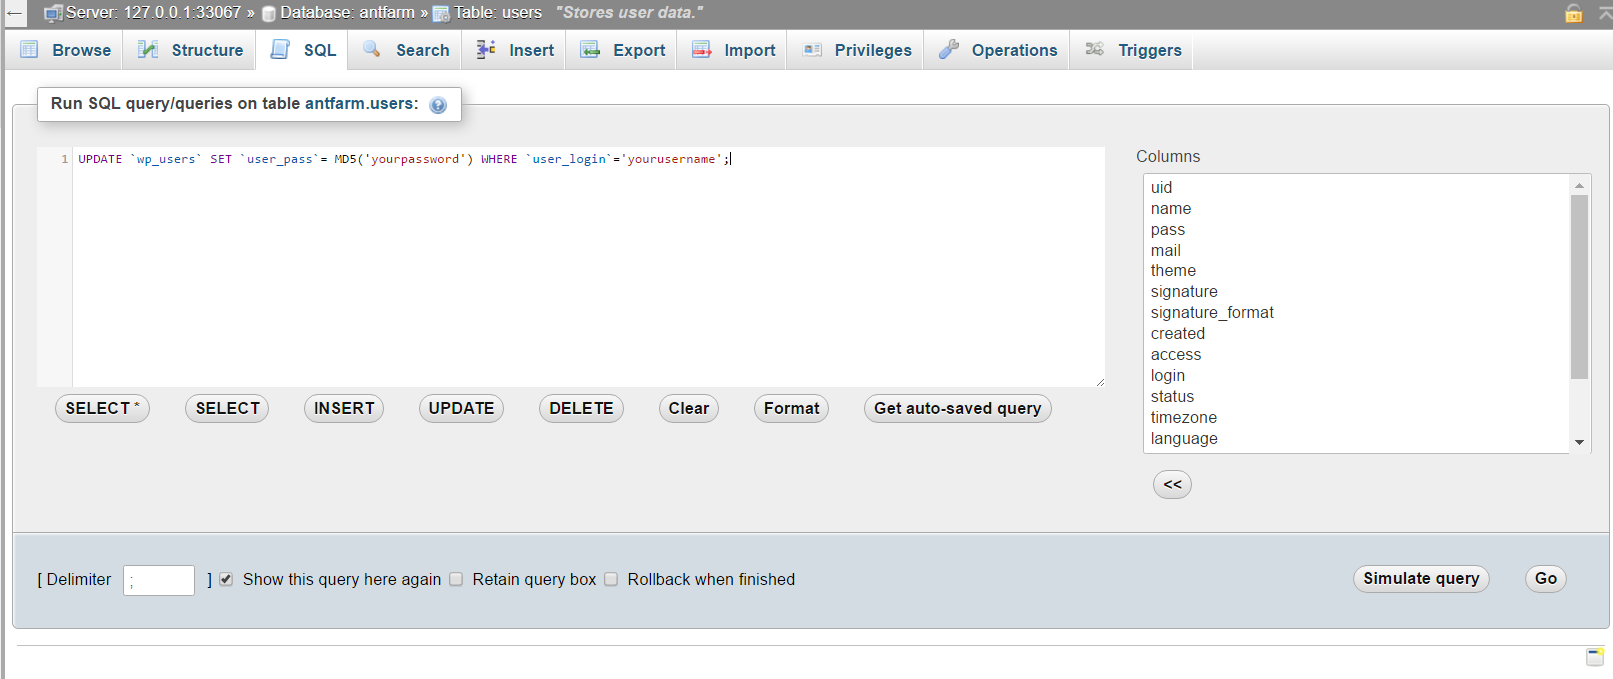
Select the SQL or MySQL tab above the table structure.

Step Five
Enter the following code:
UPDATE `wp_users` SET `user_pass`= MD5(‘yourpassword’) WHERE `user_login`=’yourusername’;
Replace “yourpassword” with the password you will use to login and replace “yourusername” with your WordPress username.
Step Six
Once you are happy with the values you’ve entered, save the new values by clicking the go button at the bottom of the page
Congratulations, you’ve reset your password through the database. You can now navigate to your website and login in with your new details.
I accidentally deleted my files, how do I get them back
Tuesday, February 7th, 2017
Imagine that you are working on a project at work or you have media that you really enjoy on your PC at home. One day you decide to give your PC a clean and start deleting files all over the place. When you sit down to work again you realise that you’ve accidentally deleted a very important file and panic sets in. What do you do?
Today we are going to show you how easy it is to recover files and media from your hard drive. In most cases, your deleted files are recoverable even if you’ve emptied them from the Recycle Bin. Chances are, your data is still somewhere on your PC. You just have to find it.
Before we begin though you will need to understand that while most data is recoverable this may not always be the case.
To understand why, you need to understand how data storage works. Inside of a computer is a hard drive where all data is stored. When a file is deleted that information is not wiped out, but rather tagged with a delete order which lets other applications on your PC know that information can be overwritten. That is why a recovery should be performed as soon as possible to avoid the original data being overwritten completely.
Recovering data from your recycle bin
There are three ways to go about recovering data. The first is pretty simple. Assuming you haven’t emptied your recycle bin since you deleted your file you can simply restore the data from there.
- Open your recycle bin. You can find the Recycle Bin icon on your desktop or go to the windows search bar and type in Recycle Bin.
- Find the file you want to restore. If you know the name of the file you can type it into the search bar at the top right hand corner of your window.
- Right click the file and select Restore.
Ta-da. Your file is back where it belongs and you can continue working on it.
Windows Backups and Shadow Copies
Restore files from a backup
If you are a responsible PC user and you have a backup of your system, you can recover files using your backup state.
To do this you will need to make sure that the drive your backup is saved on is available. If you backed up your system to a portable hard drive then make sure it is plugged in to your computer.
- Click the Start button and select the Control Panel, select System and Maintenance, and then click Backup and Restore.
- Click Restore my files, and then follow the steps in the wizard.
Restore files from a previous version
Restoring from a previous version or a shadow copy means that you are restoring a copy of the data made by windows at some point in time. This works well for the most part but if Windows hasn’t saved the very latest version yet you may end up with a file that is one or more versions behind the one you deleted.
- Click the Start button and select Computer.
- Navigate to the folder that contained your data, right-click it and select Restore Previous Versions. If the folder was at the top level of a drive, for example C:\, right-click the drive, and then click Restore previous versions.
- You’ll see a list of available previous versions of the file or folder. Before restoring a previous version of a file or folder, select the previous version, and then click Open to view it to make sure it’s the version you want.
- Double-click a previous version of the folder that contains the file or folder you want to restore.
Warning
The file or folder replaces the current version on your computer, and the replacement can’t be undone.
Download a Data Recover Tool
When all else fails its time to call in some help. Luckily there are many free data recovery apps out there that can help you get your files back. Just be careful of what you download as some software can come with unwanted extras. Tools like Recuva, DiskDigger and iSkysoft Data Recovery are good solutions.
We hope that this helped you recover those all important work files, however, if you are still having problems the friendly DigiWorks support team is more than happy to help you. Head over to our support page for more help.
How to get your pc to recognise your flash drive
Thursday, November 3rd, 2016
Why isn’t my Flash Drive being recognized?

Step by Step to connect Mac Mail for email hosted on Exchange 2010
Tuesday, October 18th, 2016
This article describes how to set up your Microsoft Exchange 2010 email account with Mac Mail.

Managing your email through your browser using Cpanels, Webmail
Monday, February 1st, 2016
How to fix the mailbox too full issue when deleting mail directly from Outlook is just not working.
If you have have reached the maximum limit on your mailbox, and deleting the emails from outlook itself has not helped, you will firstly need to follow these steps to avoid it happening again in the future, and then come back here so we can help you delete emails directly from your web mailbox.
Getting mailbox full errors? Here are your Outlook 2010 and 2013 solutions!
Thursday, December 17th, 2015
How can I avoid Microsoft Outlook 2010 and Microsoft Outlook 2013 leaving copies of my emails on the server?
With Microsoft Outlook 2010 and Microsoft Outlook 2013, it’s possible to leave a copy of each message on your mail server after you have read it, and you’ll want to do this if you read your e-mail on multiple devices. However, there is a drawback to this and that is if you are on a cheaper hosting package, your disk space will be used up quickly leading to an array of the much dreaded full mailbox issues.

Set up Exchange ActiveSync on your iPhone, iPad, or iPod touch
Tuesday, December 15th, 2015
Follow DigiWorks through a few simple steps to set up Exchange ActiveSync on your iPhone, iPad, or iPod touch..

Apple Mail? How to avoid filling up your mailbox!
Tuesday, December 15th, 2015
How can I stop Apple Mail leaving copies of my emails on the server?
With the Apple Mail application, it’s possible to leave a copy of each message on the mail server after you have read it, and you’ll want to do this if you read your e-mails on multiple devices, However, there is a drawback to this and that is if you are on a cheaper hosting package, your disk space will be used up quickly leading to an array of the much dreaded full mailbox issues.

Potentially Malicious Attachments from Google
Wednesday, September 16th, 2015
When is Google not Google? Well, it’s easy enough to find out and protect yourself. We’ve put together a breakdown of warning signs that you can stay on the lookout for to make sure you never get caught out by malicious attachments from Google lookalikes.
(more…)

Standard Bank Epayment Notice Scam
Thursday, September 10th, 2015
Are you getting notices of epayments that you’re not sure are legitimate? Be careful – it might be a scam. We’ve flagged an example of this in the Standard Bank epayment notice scam. This phishing scam targets Standard Bank account holders.
Need help upgrading to windows 10? (For Windows 7 and 8)
Tuesday, September 8th, 2015
Windows 10 has finally been released to the public, and everyone with a genuine copy of windows 7 or 8.1 can upgrade to Windows 10 for free, albeit for a limited time only. The question is how do we get it done, quickly and simply?
The answer to that question is Digiworks, we are here to help you through the process, and if after this tutorial, you still feel uncomfortable upgrading to Windows 10, contact us here and we will assist you through the process. (more…)

Infographic: Which Website is Right for My Business?
Monday, September 7th, 2015
So your business is thriving and it’s time for you to get online. You’ve asked friends, and web design companies what type of website would suit your business needs, but the only response you get is “it depends what you want to do” and a blank stare. This infographic is a basic breakdown of three types of web design so that you can answer the “which website is right for my business?” question yourself!
(more…)